
Shopify Integration
This guide walks you through embedding the Verba AI chat widget into your Shopify store. The widget will appear as a floating chat bubble on every page of your storefront.
Before you begin, make sure you have your tagId ready (which typically looks like a unique UUID, e.g., d3b07384-d113-4956-a5cc-9092928373b9). It will be provided by the Verba AI team.
Step 1 — Open the Online Store section
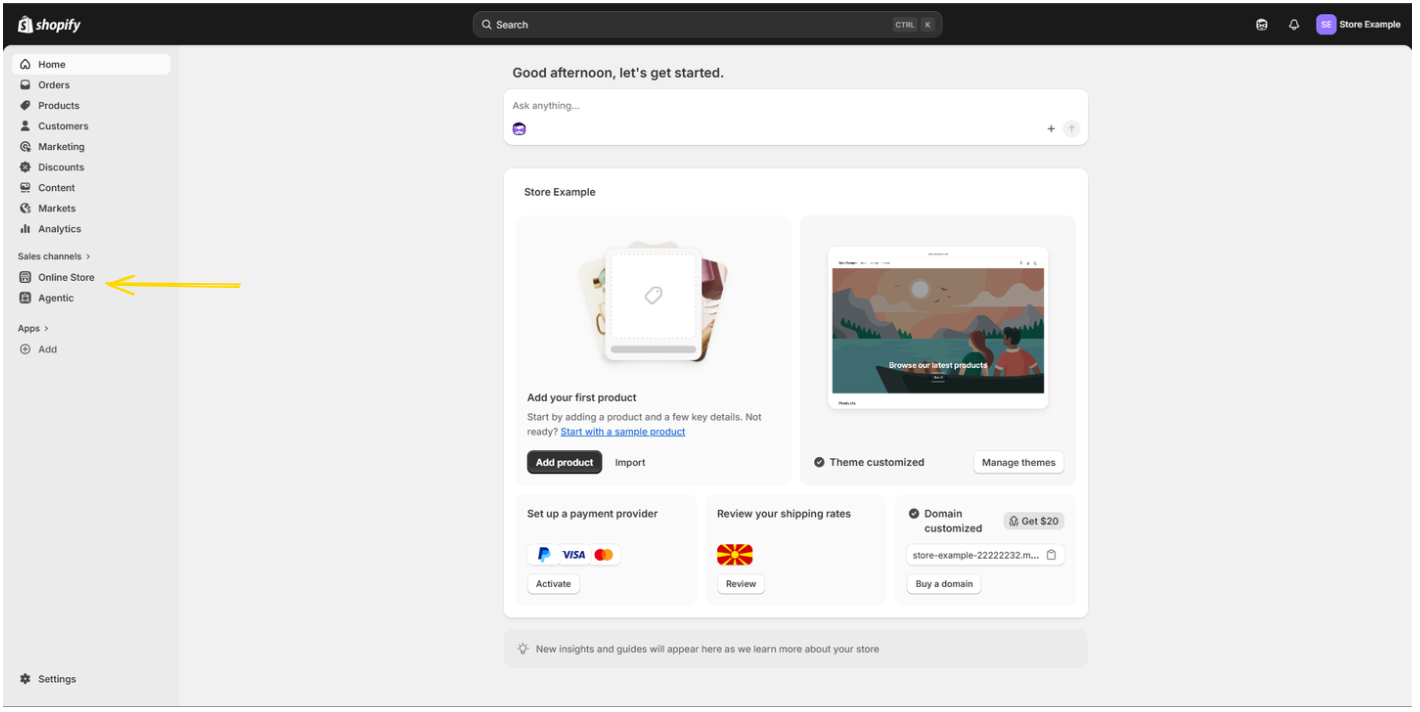
From your Shopify admin, navigate to Sales channels → Online Store in the left sidebar.
Step 2 — Duplicate your active theme
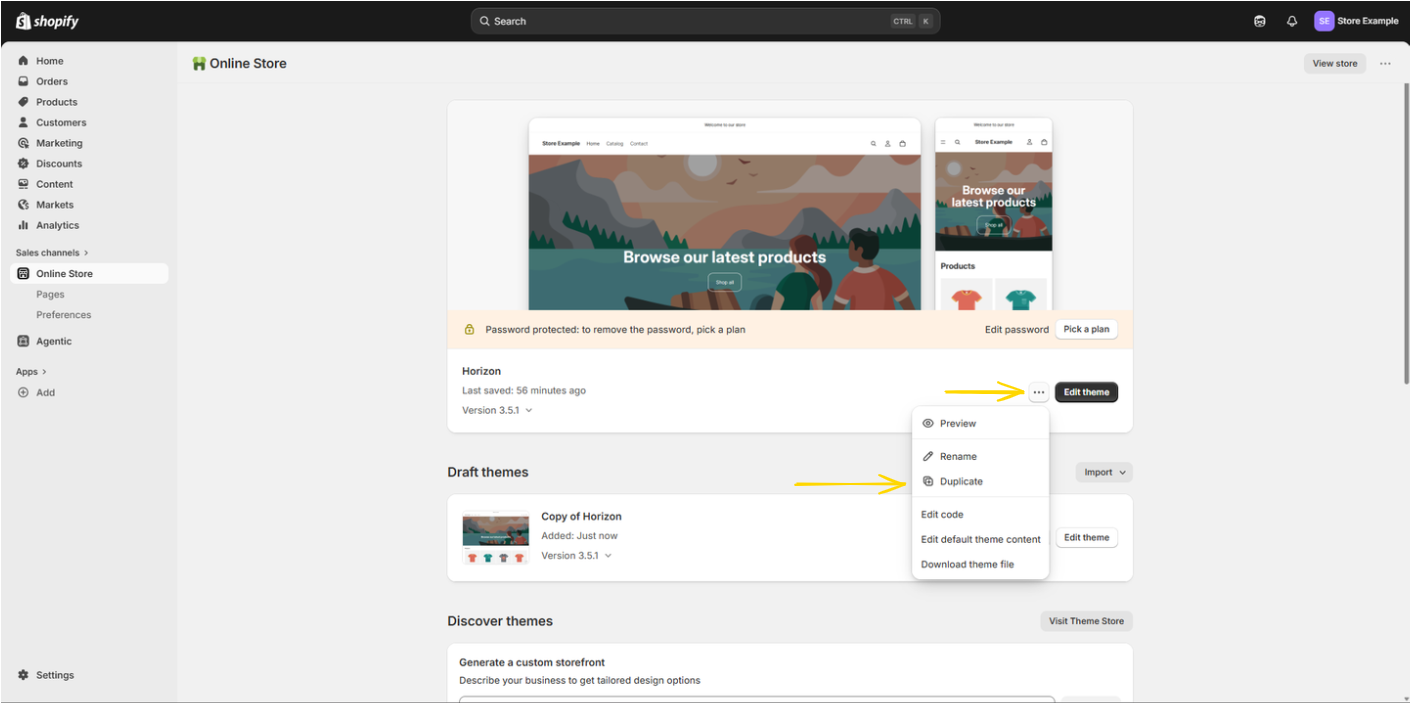
Go to Online Store → Themes. Find your currently active theme (e.g. Horizon) and click the "..." menu next to it. Select Duplicate to create a safe working copy before making any code changes.
Step 3 — Open the draft theme's code editor
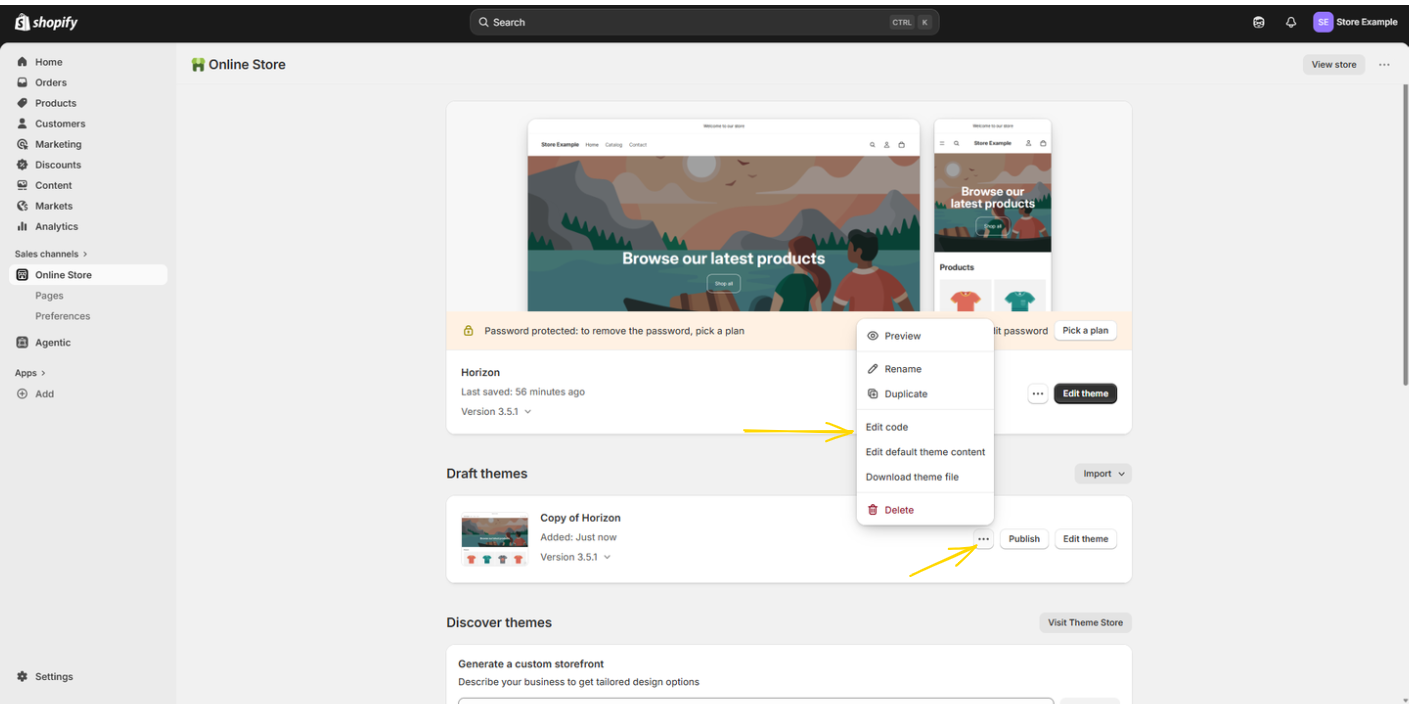
Once the duplicate appears under Draft themes, click the "..." menu on the new draft and select Edit code. This opens Shopify's built-in code editor for that theme.
Step 4 — Open theme.liquid via Go to File
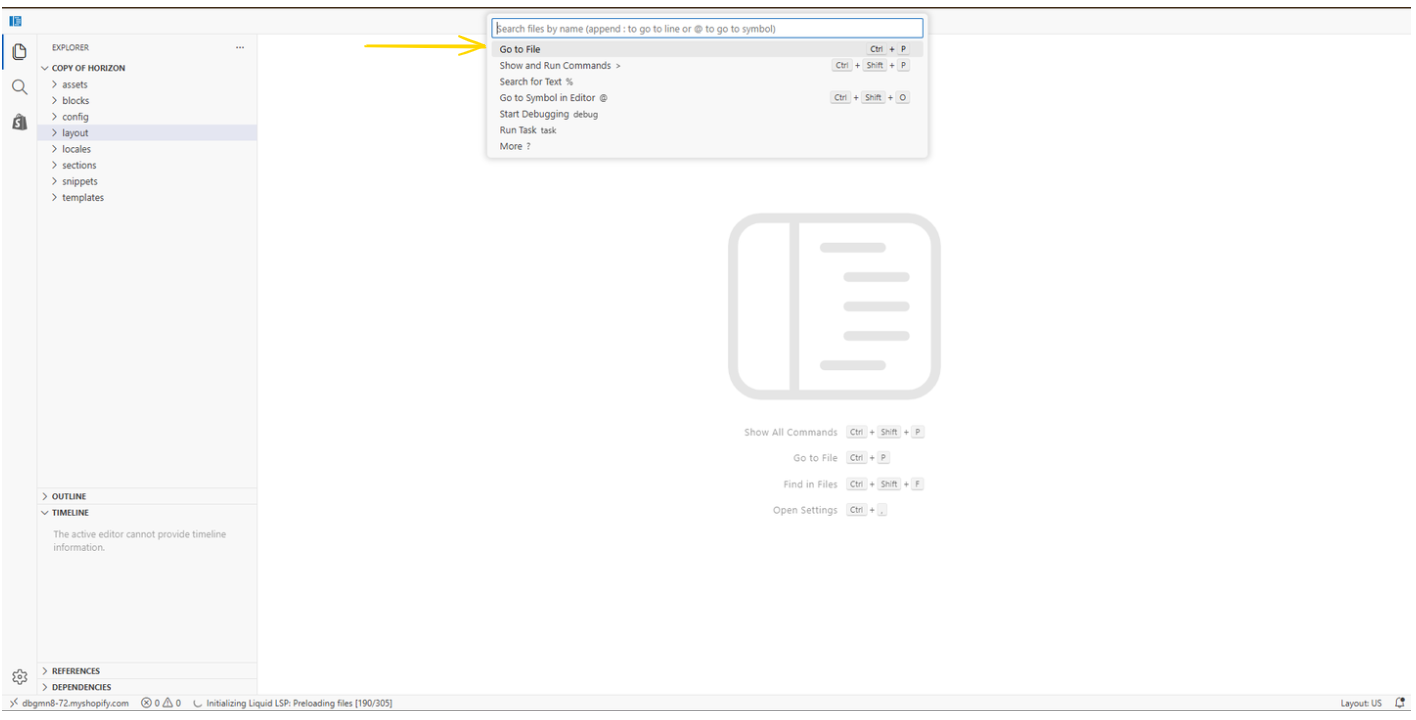
Inside the code editor, press Ctrl + P (or use the command palette) and search for theme.liquid. Open the theme.liquid file, it is the global layout template that wraps every page of your store.
Step 5 — Paste the Verba AI script before </head>
Locate the closing </head> tag in theme.liquid and paste the following script block just before it. Make sure to replace YOUR_TAG_ID_HERE with your actual tagId provided by the Verba AI team.
<script type="module">
    import { VerbaChat } from 'https://esm.run/@verba-ai/chat-sdk@latest'

    const chat = new VerbaChat({
        tagId: 'YOUR_TAG_ID_HERE',
        theme: 'light',
        bubble: {
            chatIconStrokeColor: 'black',
            closeIconColor: 'black',
        },
    })

    chat.init()
</script>
After pasting, click Save in the top-right corner of the editor.
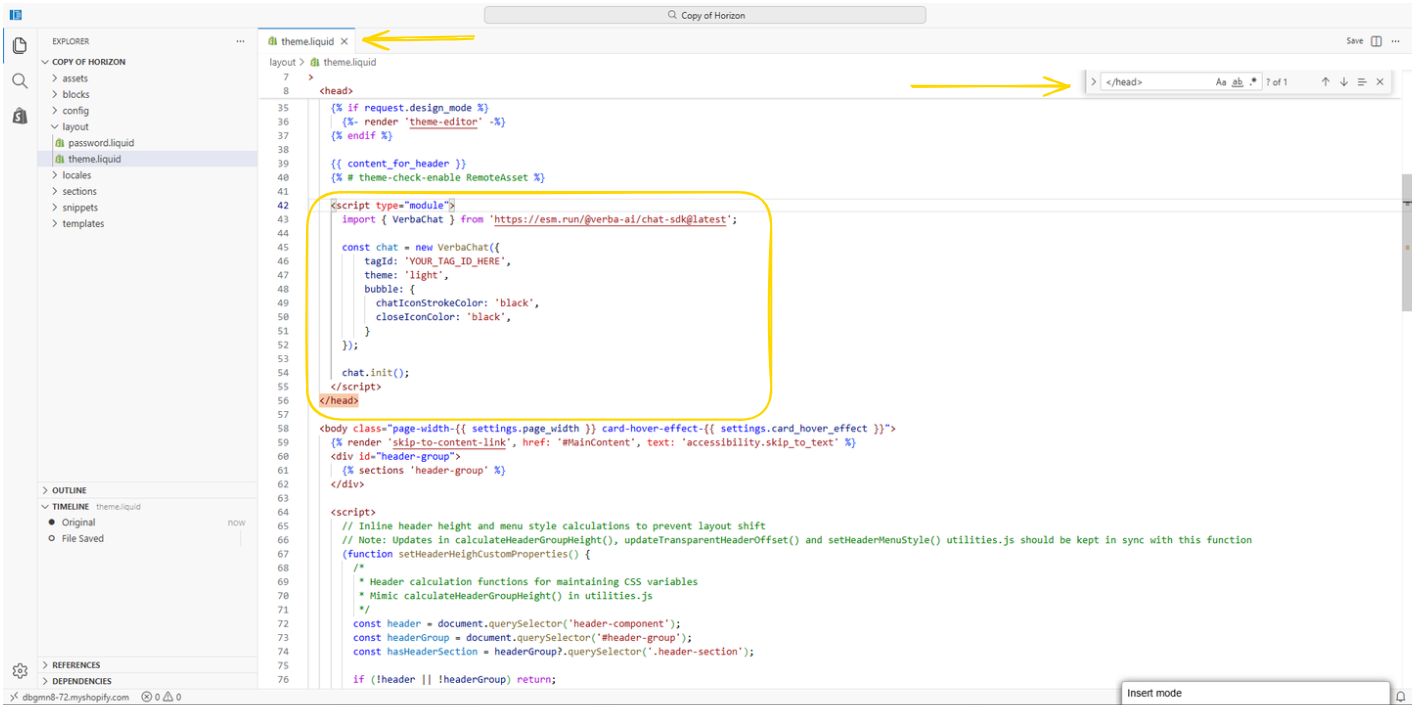
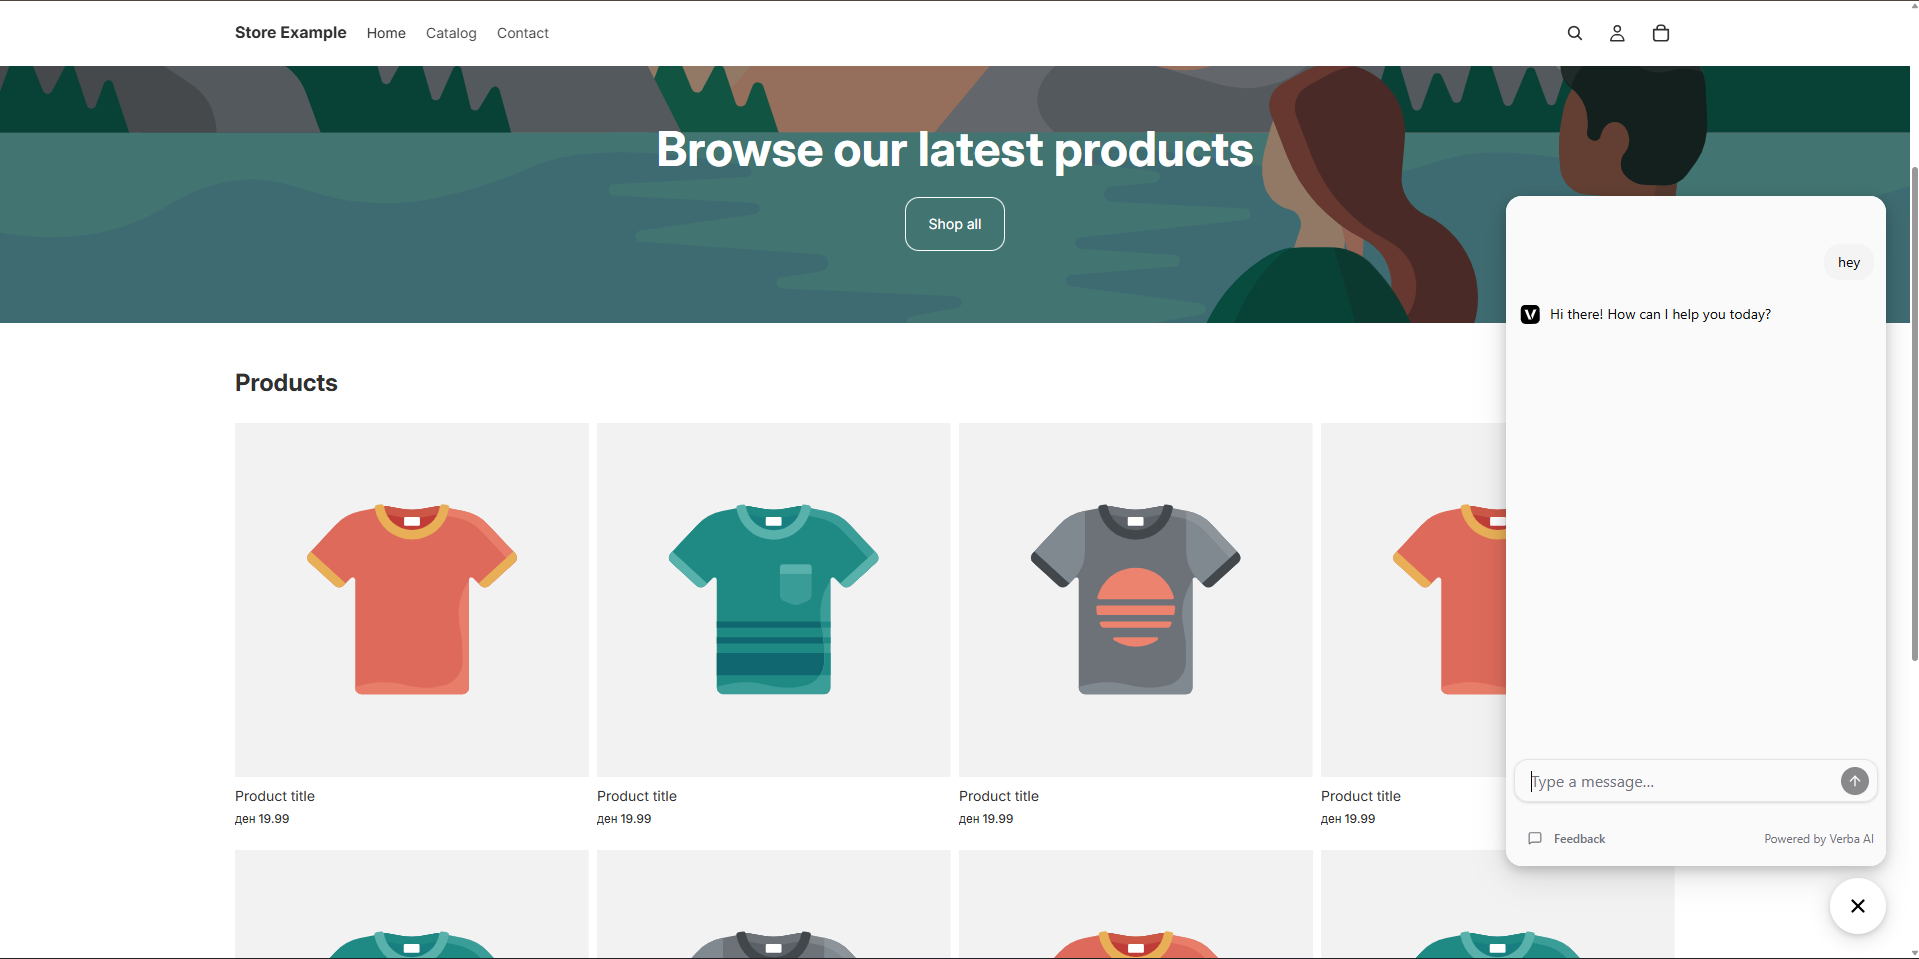
Step 6 — Preview the result
Open your storefront (or click View store from the Themes page) to see the Verba AI chat widget loaded as a floating bubble in the bottom-right corner of every page.
Publishing the draft theme
Once you are happy with the result in the draft, go back to Online Store → Themes, find your draft, and click Publish to make it your live theme.
Configuration options
The snippet above uses the minimal required configuration. For the full list of options like theming, inline mode, authenticated sessions, and more, please refer to the Configuration and Theming pages.